Friday, June 3, 2016

DIY Vegan Body Butter Bars


I love the popularity of lotion bars these days.  Of course, I would rather make them myself to reduce wasted packaging and to ensure the ingredients are safe for my ridiculously sensitive skin.  With a little one, I wanted something safe to use around her.  I also wanted something without beeswax which is a common ingredient in many of the bars on the market as well as many of the DIY recipes I found on the internet.  So, after some testing, this was the recipe I used.

I choose coconut oil not only for its moisturizing properties as an oil, but also due to its high content of vitamin E which is known for its antioxidant properties in repairing skin.  Unlike palm oil, more is being done to ensure sustainable practices are put in place with the increase in popularity of coconut oil.  As always, it is best to do your own research before purchasing to ensure the company you are purchasing from is instituting these practices.

Shea butter is also high in Vitamin E.  It has some of the same moisturizers produced by our own skin making perfect sense as to why it has been popular with the cosmetics industry for some time.  The popularity of shea butter and rise in its fair trade have not only lead to increases in environmentally but also economically sustainable practices with its production.

I choose to use Lavender for my essential oil.  I chose lavender as summer is approaching, and lavender is known as a natural mosquito repellent.  Lavender is also known to be relaxing which I know as a mom to a toddler, I know I can use.

You can use whatever essential oil you prefer, however, you should take safety into consideration.  I would avoid any citrus based essential oils due to photosensitivity they may cause.  Also consider whether you will have little ones around.  Since I have a little one, I avoided peppermint and eucalyptus despite these being scents I enjoy.  Both are known to cause respiratory with small children.  If you have pets, you will want to take their sensitivities into consideration as well.  When in doubt, consult a certified aromatherapist before using any essential oil.  I also highly recommend checking out this site for further questions about essential oils including where to find a certified aromatherapist in your area.  I appreciate their emphasis on safety and testing.

So, here is my recipe:

Materials:

Mason Jar
Pot
Bamboo Skewer
Measuring Cup
Water
Canning Rack or Canning Tongs
1/2 cup Fair Trade Unrefined Shea Butter
1/2 cup Organic, virgin unrefined Coconut Oil
4-6 drops of Essential Oil
Silicone molds
optional: silicone mat

1. Boil water.

2. Measure out the Coconut Oil and Shea Butter into the Mason Jar.

3. Place the jar into the boiling water.

4, Keep the jar in the boiling water until the Coconut Oil and Shea Butter have liquefied and well mixed by stirring occasionally with your bamboo skewer.

5. Carefully remove your Mason Jar either using the canning rack or canning tongs.

6. Allow your mix to cool slightly before adding 4-6 drops of your Essential Oil.

7. Carefully pour your mix into molds.  The size of your mold will determine how many bars you make.  I made 4 with mine. If you are concerned about your ability to pour into the molds, you may wish to place a silicone mat underneath the molds to catch any spillage.

8. Allow to cool until fully set usually at least 4 hours.

9. Remove from molds and store in an airtight container in a cool area. Room temperature is generally cool enough to prevent them from melting with air conditioning though I still would not recommend keeping them in the kitchen as anyone who uses coconut oil can attest to in the summer months.

10, Rub between your hands or directly on the skin you wish to moisturize.  The warmth of your skin will melt the bar enough to moisturize your skin.  The bars will keep for up to a year kept in an airtight container when not in use.


This post is part of series of eco-sustainable Diys from a group of bloggers I know.  Please check their posts out as well.

DIY Upcycled Corkboard
http://thepinkpaperdoll.com/make-your-own-corkboard/

Slow Fashion - Sashiko

How to make your own bug spray and bug bite sticks:
http://littlesproutslearning.co/make-bug-spray-bug-bite-sticks/ ‎

How To Build Your Own Vermicompost Factory
http://www.everchangeproductions.co/build-vermicompost-factory/ ‎

Thursday, June 2, 2016

Free Donuts for National Donut Day


Tomorrow is National Donut Day. Unlike most food holidays, Donut Day actually has a story behind it of Salvation Army  female volunteers handing out doughnuts and warm beverages to World War II soldiers to provide them comfort.  I am more than happy to celebrate the warm goodness of a fresh donut once a year after spending several summers making donuts.  Okay, maybe I indulge a few times a year usually whenever they are free; and I see a hot and fresh sign lit up.

Look at LB enjoying her first half of a hot and fresh donut last Halloween.  Occasionally, she gets that expression of being in absolute heaven eating a food.  That day, I concurred.


Several places are giving away free donuts in honor of the holiday.  Here are a few:


Krispy Kreme: One free donut.  No purchase necessary.(We'll be looking for the hot and fresh sign on our way home.  Fingers crossed it's on.)

Dunkin Donuts: One free donut with the purchase of any beverage.

Duck Donuts: As long as you claim their offer on Facebook, you can get a free sugar donut.  No purchase necessary.

Sugar Shack: Varies by location, and most locations have had different ways to get a free donut all week.

Just in case you happen to be local to Fredericksburg, Virginia, I thought I would include:

Paul's Bakery: One free glazed ring donut.  No purchase necessary.

We may also celebrate by trying to perfect a homemade cronut recipe since I have been a convert ever since trying a croissant donut at a Wawa not in our area.  I haven't been able to find them at any Wawas since.  If I do finally get one that is up to my standard, I'll be sure to share.

Sunday, May 29, 2016

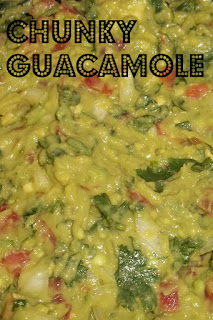
Chunky Guacamole


I know it's not Meatless Monday.  However, due to the holiday weekend, I thought I would post one of my favorite party or even every day dips.  I struggle with whether I like guacamole or hummus more.  Both are delicious and nutritional powerhouses.  Don't worry, though as I am still planning on my recipe for Coleslaw with Crushed Pineapple on Monday as it will go perfectly with our sweet potato faux bbq sandwiches.


Ingredients:

2 avocados
1/2 red onion or a sweet onion like a Vidalia in a pinch
3 roma tomatoes
1 tbs minced garlic
1 lime
1/2 a bunch of cilantro
salt to taste

1. Cut your avocados in half.  Remove the seed and peel.

2. Roughly mash the avocados with a fork being sure to leave occasional chunks of avocado.  Sometimes, I like the chunks the best.

3. Dice your onion and tomatoes and onion adding them to the avocado.

4. Juice the lime and add it to your mix.

5. Using kitchen shears, roughly cut the cilantro and add it in as well.

6. Add the garlic and as much a salt as you prefer.

7.  Stir everything up to mix thoroughly.

This recipe serves 2-4 depending on the appetite.  You can always double as needed.  I gave a recipe instructions for a small batch as this is more than enough for our family of 3.  Guacamole browns easily, so I usually only make as much as we will eat in a sitting and usually prefer to make it as close as possible to serving.

We like to use this as a dip for tortilla chips or veggies as well as on sandwiches and homemade tacos.

Friday, May 27, 2016

Early Lessons in Container Gardening


This post has been in the work for weeks.  Due to the nature of our land, traditional gardening is not really in the cards for us.  I had my heart set on being able to make and can tomato sauce to last us through the year this year as last year's haul from the farmer's market and my parent's garden only last us through the middle of April.  So, I decided to take on the project of container gardening despite my poor results the one time I tried to raise a tomato in a pot when I lived in an apartment.  To be fair, I didn't kill the tomato despite almost always being in the shade and my not doing the best job of remembering to care for it.  It did eventually produce three whole tomatoes.  They were still better than just about any I could get in a grocery store.

With everything going on with our family including having two members in the hospital at one point with one being an hour and a half from home, time has not been on my side.  Then, we got hit by almost a month straight of rain with at most 2 days a week without rain.  So, work on my container garden has taken place in fits and spurts.  Often with just a couple plants getting planted a week.  While I have made some mistakes along the way like leaving some young seedlings outside in hopes of getting them some sun not realizing we were going to be hit with a large downpour, I wanted to post here about my journey to encourage others to consider container gardening as well.  So, this will be my first post with hopefully many updates throughout the summer and eventually autumn as I am hoping to plant some fall crops as well.  I know if I can be successful despite everything working against us, there is hope for anyone.


These were the first bloom of a blue potato.  I adore the purple hue the leaves have when they are this tiny and just erupting from the soil.   The blues were grown from seed potatoes, but all the rest of my potatoes are from scraps.  As of this week, all 9 of my potatoes have erupted through the soil.  Hopefully, since they were all planted at different times due to my time constraints, they will all be ready to harvest at slightly different times allowing me to continue to work just a bit at a time on them.


A week later, here is the same potato plant.  As you can see, sadly they do not retain that gorgeous color to the leaves.  I can't wait to see them flower.  


Here is the one tomato seedling that I thought had survived my unintentional drowning of the tomato seedlings.  This is a green zebra from the foodie lovers pack I received from Uncommon Goods.  I highly recommend their site for purchasing gifts especially and will be posting about them soon.  Please check them out.  
Luckily, once I was able to dry them out, about half of the other seedlings eventually perked back up.  The remaining tomato seedlings are all Black Krim.  Sadly, none of my Roma tomatoes made it.  I was so looking forward to using them for tomato sauce.  

This picture was taken 2 weeks ago.  The picture at the top of the post is an update taken today.  

To cut down on time, I used a mixture of plants grown from seeds myself, plants I purchased, and plants I grew from scraps.  We were limited on space, so the majority of our plants are growing on a makeshift plywood table.  In fact, I only have two large pots on the ground; one tomato on the deck and one potato by the office door.  Most of these are in small plastic pots,but I am planning on transplanting the potatoes seen here to 5 gallon buckets as I can acquire them.

So far, I have 3 different types of potato, 2 different types of eggplant, 6 different types of tomatoes, 2 types of pepper, 1 zucchin, thai basil, sweet basil, dill, garden sage, rosemary, and lavender.  I still have several veggies and herbs I plan on adding.

So, I have a few lessons thus far.

1. Even just being able to carve out 20 minutes of time, you can get your garden started though it will be slow.

2. Spacing out planting will allow you to space out harvesting.

3. Using a variety of planting methods whether it be seeds, scraps, or seedlings can save time as well as give you early feelings of success which will provide you incentive to keep going.  

4. Plants can survive our mistakes. 

Tuesday, May 24, 2016

Why You Should be Taking Your Infant to the Library


I am sure we all want our kids to take joy in reading and see the benefits of taking our kids to the library once they are old enough to read or at least to sit still to be read to.  However, I would argue there are benefits to taking little ones who are just months old to the library, now.  Many libraries have changed and evolved beyond places you merely check out books.

1.  Many libraries now have story time specifically geared to infants.
My local library breaks down their story time by age bracket offering a Mother Goose story time for the under 2 bracket.  Even I was a bit skeptical of how much my daughter would get out of a story time that I wasn't doing at home by trying to read everything I could to her out loud even labels on cans.  Well, it's not just story time.  They incorporate music and movement in addition to stories.  So, a typical Mother Goose story time which is only 20 minutes usually begins with an opening song that involves hand movements like Itsy Bitsy Spider, then moves to a story either in the form of a short book especially a flap book the older kids can help open, a felt board story, or a puppet show, then there is music and movement time which lasts for generally 2 to 3 songs, and ends with a closing song also with hand gestures.  During the music and movement portion, librarian passes out egg shakers or bells for either the kids to play or for the parents to play for them when they are really little.  Several centers in my area offer similar classes usually for $20 or more a class.  Getting it at the library for free(through taxpayer dollars, I know) is quite a bargain.  I've taken my daughter to a free trial of one of these classes and can tell you the only notable difference was that they also have a parachute time.  As my daughter has grown, she has enjoyed participating at different levels in the activities.  The librarians often even include handouts especially at holidays with books and activities specifically for their age range.
My little one dressed up for the costume parade during Halloween story time.

2. The library is a great place to meet other moms and babies.
I don't think I realized the importance of having mom friends with babies until I had a kid of my own.  Things are ever changing when it comes to babies whether it is car seat recommendations, where to take mommy and me swim lessons, pediatricians taking new patients, etc.  If you happen to be a stay at home mom, I found it super helpful to be able to talk to other moms who were in the midst of the same trying times as I was especially when it came to sleep regressions and teething or even my own hair falling out. Being a stay at home mom, I find the chance to talk to other adults necessary for my sanity. Plus finding other tots for your little one to play with is helpful these days.

3.Libraries now often have tot rooms specifically designed for the age 5 and under crowd.
Ours has wooden puzzles, a magnetic board, activity cubes, cardboard blocks, foam puzzles, and other toys designed for the younger set.  Both my little one and her cousin who is 4 love playing there.  I usually have to argue with them to get them to go even after an hour or more of playing.  It's especially nice free retreat on a rainy day, when you just need to get out of the house, or even a good time to play with the other littles after story time.

My little one playing with a bead maze in our local library's tot room.

4.Many libraries now have book sales as fundraisers where you can get books for all ages for uber cheap or even free.
 The libraries in my area have different sales.  I've posted before about the semiannual sale the library where I used to live has where the last two days you can fill a large box with books all for $1.  The books are either donated or books the library is removing from circulation often due to more copies than necessary anymore.  I used to be able to fill the box with 60-80 adult books.  You can imagine how many children's books I could have fit.  The library closest to where I now live does something similar once a month where the last two days you fill a plastic grocery bag for $1.  The times I've gone, I've averaged 20-30 children's books per bag.  Then, after the sale is over, the remaining books are available for free. Very few if any children's books make it past the sale, though.  My best luck with scoring children's books was last July when the sale occurred over the Fourth of July weekend.  Since they were closed for the Fourth and had less than usual visitors for the holiday weekend, they had lots of books leftover by the dollar days.  I picked up an almost complete set of the Sweet Pickles books along with several other books for just a dollar.

5. Libraries offer special events for babies and toddlers.
The local libraries have several events throughout the year for the under 5 set.  


One we particularly enjoyed was a holiday open house last December I have pictured above.  LB and I are in the back right.  You can find me by looking for my big blonde hair.  One of the high school choirs performed both traditional Christmas carols as well as kid songs like Frosty the Snowman.  They had a snack break with cookies and pretzels.  Then, they read two holiday stories while families could take turns taking pictures with Santa for free.  Even better than the free part was that when it wasn't our turn to take pictures, the girls were entertained with a story.  I dread the idea of waiting in line at the mall with my little one for pictures with Santa or the Easter Bunny that I've only done pictures at events like this to avoid the frustration for her.  We meet up with one of a friend and her little one who is a couple of months younger than my little one.  The girls loved seeing each other though neither were fond of this Santa.

The best picture I could manage with the library Santa.  Thankfully, we had better luck with the Santa at Walmart, so I was still available to avoid lines to get a picture of her with Santa.

6. There are meeting rooms you can utilize for not for profit meetings.
Several groups I participate in hold their meetings at the library.  I have even checked out rooms to hold sample demonstrations of products to other moms.  We don't have many community centers left in our area, so the meeting rooms are great meeting spots that are safe to have your kids with you.  The particular room I used below had all the outlets for the room in the center of the table which made it easy to keep little hands away from them.

I'm demonstrating the Neil Med Naspirator for a local moms group I participate in.


Monday, May 23, 2016

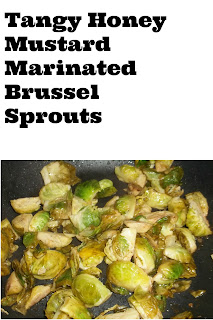
Tangy Honey Mustard Marinated Brussel Sprouts

Meatless Monday


Sadly, the first time my daughter had brussel sprouts. I was not the one who cooked them.  She was offered some by a relative and rejected them.  My daughter had never turned down trying a new food, so I was a bit concerned.  As a kid, I refused brussel sprouts after having some at a holiday dinner prepared by my aunt.  My mother tried to convince me my disdain was due to my aunt's poor cooking skills.  I refused to believe my mother on the topic and spent years avoiding brussel sprouts.  However, after my aunt made mashed potatoes one fateful Thanksgiving that had a consistency closer to wallpaper glue, I, thankfully, began to reconsider my position on brussel sprouts.  Now, they are one of my favorite veggies.  I try to make sure they are at all holiday meals myself now to ensure they are not ruined.  So, I decided to taste the offending brussel sprouts my own daughter was rejecting.  Well, no wonder she was having none of it.  They were freezer burnt.

I was a bit nervous reintroducing brussel sprouts to my daughter after she had a negative experience.  So, I decided to use two ingredients in my preparation I knew are universally popular with toddlers; lemon juice and honey.  Not only did she eat all of her's the first time I prepared them, she began stealing ones off my plate.

Ingredients:
1 lb brussel sprouts
1 tbs brown mustard
1 tbs honey
2 tbs lemon juice
1/2 tbs minced garlic
salt and pepper to taste
olive oil

1. Combine the honey, mustard, lemon juice, garlic, salt, and pepper to make the marinade.

2. Cut each of the brussel sprouts into quarters.

3. Toss the brussel sprouts in the marinade and place in the fridge for a minimum of an hour though overnight is best.  If necessary, you can cook just a portion of the brussel sprouts at a time and keep the remainder in the fridge for up to 3 days.

4.  Saute the brussel sprouts in olive oil until they are slightly crisp

Friday, May 20, 2016

Tips for Gardening with a One Year Old


Let's be honest, I had two opposing thoughts when it came to including my little one in my gardening adventure this summer.  My first thought was how excited I was about including her in the food to table process, teaching her the limited things I do know and am learning about gardening, and being able to get her more time outside which is always a plus in my book.  However, my second thought was that my "destructo" child may be more of a hindrance than a help.  So far, I've discovered both are true.  But, I am convinced the benefits outweigh the difficulties she may create; so I had to find a way to make it work.

I thought I would share with you some of the lessons I've learned.

1. Find age appropriate ways your little one can participate.
At 19 months, she is an expert at ripping things right now, so I've been able to allow her to tear off herbs for now while waiting for the fruits and vegetables to come in.  They may not be perfect, but herbs tend to be forgiving unlike some tender fruit.  I suspect she'll be great at pulling root vegetables when they are ready as well.

 If I were gardening in the soil, I would definitely allow her to help me to dig holes for planting with a kid safe shovel or her hands depending on the size of the hole I needed.

We went to a Spring Carnival put on by a local high school's Band Boosters.  A local realtor was handing out wildflower packets with her card.  Letting my little one throw out the wildflower seeds are a perfect activity at her age.  She can be messy, and it is perfectly okay.  If you are worried about placement, of course, you can do flower bombs.  As for me, I figured I could allow her to throw them and let nature take its course.  As they grow, she can pick them or just watch them grow. The wildflower seeds were all small enough that I would not consider them a choking hazard either.

If I had a traditional garden instead of a container garden, she would be at a great age to help with weeding as long as there were no seedlings nearby.

Include her while shopping for your gardening supplies.  I took my lo with me every shopping trip.  Sometimes, I would give her two choices i.e. two similar tomato plants and allowed her to pick one.  I talked to her throughout the whole decision process.  Not only is this a chance to work on her language skills, but she also got to feel as if she was part of the process.

We have had too much rain here this last month to need to water my plants.  However, we have a kid size watering can at the ready for the drier days of summer for her to assist in watering.

2. Remember, as always, safety first.
Even with organic gardening, there are still some things you won't want little one getting into.  I used a trowel to transplant some of the plants I bought as I acquired larger pots or containers.  While my trowel is nowhere near as sharp as kitchen knife, I still didn't want her getting her hands on it and possibly hurting herself.  So, when the trowel wasn't in the soil, I made the effort to put it far out of her reach.  If you buy store bought plants, many have plastic wrap that needs to be removed by either a knife or scissors.  It is worth the extra planning to have a surface high enough they can't climb or walk it back inside as soon as you are done.

I would also recommend using compost or potting soil that is free of manure.  Little ones love to put things in their mouth, and I, personally, wouldn't want to risk exposure to bacteria that might be in manure.

Also, be cautious with what plants you choose to grow as some plants have parts which are poisonous to eat including tomatoes, rhubarb, and asparagus.  That being said, I am still growing tomatoes.  I have them high enough the little one will not be able to reach them without assistance allowing me to keep a good eye on her to assure no leaves make it into her mouth.

If gardening outdoors, remember sun safety.  My little one is terrible about wearing sun hats and has to be in the mood to keep her sunglasses on.  However, we do practice use of sunscreen and proper reapplication if necessary.

3.Find alternatives that are encouraging.  
Some of this may be trial and error.  I originally was going to allow her to aid me in adding some potting soil and compost to my plants once I placed them in containers.  She had other ideas.  Instead, she decided it would be fun to try to remove as much soil as she could from the pots.

See the pile of potting soil beside her in the picture above.  While she looks like she is calmly examining the plant marker of this tomato plant her grandmother bought her, that pile was her doing.  
She also tried her hand at eating it repeatedly.  Being a first time mom who tends to worry about pretty much everything, I desperately tried my best to clean her mouth out.  Thankfully, potting soil whether organic or not is not going to kill her.

So, eventually, I gave her a pot with plastic under and let her go to town removing as much dirt as her heart desired.  She was happy and I could get work done.  I call that a win.

4.Accept learning even if it wasn't the lesson you had planned.
Remember her dirt pot I just mentioned.  She eventually got creative and found a stick to aid in the dirt removal.  I must admit I was so proud of her for her use of a makeshift tool that I called her father immediately to tell him while I continued to watch her.  I am so amazed at the little connections her brain is constantly making.

5. Sometimes, babywearing saves the day. 
I know I have touted my love of babywearing previously, however, just in the last few weeks, it has been a lifesaver with both allowing me to work on my garden as well as maintain my sanity.  This year, we are doing a container garden most of which is on a makeshift table made of a piece of plywood on two sawhorses.  Due to the height, she is unable to even see most of the plants unless I have her on me.  However, just like being on me while cooking, I am convinced she is still absorbing lessons by just seeing what I am doing.

Just the other day, she was being especially fussy at a superbly inconvenient time while her father was trying to deal with work matters on the phone.  Her fussiness was mainly due to her fighting taking a nap.  I took her outside to our plants and talked to her about their growth, pointed out the new shoots some of the potatoes had made through the ground, discussed the color of the flowers that had begun to bloom on our patio eggplant, and talked to her about the meals we could cook with the food we were growing.   She calmed down almost immediately both from being worn and being outside.

6. Consider multiple senses.
Pick plants with consideration to color, texture, smell, and of course, taste.

Herbs are especially helpful in the smell and texture categories.  I have already been able to give her a sage leaf to rub between her fingers with much glee.  I have held up all our herbs for her to sniff as well.  I tried to choose a variety of herbs considering our limited space.  So far, we have cilantro, sweet basil, rosemary, dill, sage, thai basil, and lavender in bloom.  I hope to add a few more especially parsley and oregano as well as possibly some variety of mint.

I am trying to ensure that the garden we have will be colorful as well not only because we try to eat all our colors, but also, as we know kids like a variety of colors.  So far, we've got yellow and red from tomatoes, purple from eggplants and peppers, and green with zucchini and peppers.
 
7. Think outside the box.
Creating adventurous eaters begins with exposure to variety.  Getting kids to try new things can start with small touches like nontraditional colors for everyday food.  I am fairly sure the first pepper my daughter had was a purple one from my parent's garden.  However, I know that is not the norm for most kids.  So, I've planted blue potatoes, yellow pear tomatoes, and purple peppers.

8. Have a backup activity.
At this age, they tend to work on their schedule.  They may be over garden time as soon as you get out there or even ten minutes into it.  Just being outside with you is good enough, though.  As you can see in the picture above, she has her bubble wand in hand for when she's ready.  A play lawnmower or ride on toy are also great to keep them nearby but occupied.

9. Work in smaller increments.
I could stay outside working in the garden for hours happily; however, a one year old rarely has the ability to maintain interest in an activity for that long.  Consider their attention span when planning your time.  So, this may mean going outside for 15 minutes after breakfast, twenty minutes after snack time, and another 15 minutes later in the day.

10. Think about some plants just for hummingbirds and butterflies.  
This is a great age for them to happily watch birds and insects. Many stores sell mini garden kits for this sole purpose or you can easily choose the plants yourself like bee balm, milkweed, and coneflowers to name a few that they like.

11. Make use of naps.
Realistically at this age, it probably easier to do some of the work of gardening on your own time if possible when napping or another adult is watching them.  As much as I love my daughter, I know I would be wary of her trampling my seedlings if I had a garden in the ground.


She may have muddy knees, but it certainly was worth the extra work for stain removal being able to remember the joy captured in this picture she felt not only being outdoors but also participating in something with me.

Wednesday, May 18, 2016

Tabernacle United Methodist Consignment Sale Haul

I know it's been a while since the sale; however, I've been running behind a bit due to some family emergencies which ended up leading me to miss 2 of the consignment sales I had been planning on shopping this season.  I am slowly trying to play catch up while also working on networking for the blog.  

So, even though it has been awhile since the sale, I still wanted to post my haul because I hope it helps others not only see what great deals you can pick up at consignment sales hopefully encouraging others to dip their toes into the addictive world of consignment sale shopping, but also to give you some idea of what typical prices are for items you would find at these sales.  While the spring consignment sale season is over where I live, summer and fall sales will be here before we know it.

This sale happened to be not only the sale I spent the most at this season, but also the one I picked up the most items.  I spent $40 total for all the items I purchased.  Since this was sponsored by a nonprofit, there was no sales tax which is always nice. 

I picked up this B. Meowsic Keyboard for $5 making it my most expensive purchase the entire season.  I didn't mind spending a little bit more on this keyboard since it is a rare item at the sales in my area, and something I know will keep her interest for years for my little one unlike some toys.  Both my daughter and her cousin who is less than a month away from turning 5 have logged in hours playing with this keyboard.  They especially like hearing themselves sing into the microphone which also has a record option.  

 18 month outfit for $1.50.  I like outfits that already go together but done in neutral colors I could pair with other items.  I find this is a biggie since sometimes I get lucky, and my little one only manages to stain either her top or bottom.  Since she is a stain magnet often going through 3-4 outfits a day, I will look for any reasonable way to reduce the amount of laundry I have to do.  I know I could just let her run around naked or just in a diaper to save on the laundry load for me.  However, her father is opposed to this.  You can easily guess which one of us is responsible for laundry in our house.


Four pair of 18 month pants grouped together for $3.  As I mentioned before, buying clothes in lots like this can often be a good way to save money as long as you like all the items which I happen to since I am a huge fan of bright colors.  

18 month jeans for $1.  I try to pick up jeans for $1 or $,50 cents if I can since I know they will get a ton of wear in my house.  

18 month yoga pants for $1.  Not only do I like the cuteness factor of these especially since I'm trying to start making it to mommy and me yoga classes, but I can always use some plain black pants for her.

18 month leggings for $1.  Nice neutral colors, and in the falls I figure I can pull her socks up to cover up the hot pink if necessary.

I broke my own rule on these and picked up a pair of 3t leggings for $1 due to my ladybug obsession since they looked rather new hoping the elastic holds up until she makes it to 3t clothes which at this rate feels like will never happen.

18 month ladybug tops sold as a lot for $1.50.  I am fairly certain she will still be in 12 month clothes by the end of summer, but they didn't seem too large to sneak them in by August.

12 month summer romper for $1.

18 month pants for $1.

18 month dress for $1.  Even though it could be worn by itself as a summer dress, I think the colors are neutral enough that I could make it a jumper to transition to fall or possibly next spring.

This onesie is by Faded Glory, so normally I would have avoided it due to their low resale value which is something I try to consider when making purchases.  However, I was having a great deal of difficulty finding summer tops for her after several sales.  So, I gave into the cuteness and picked this up for $1. Paired with the right bottom, I may still be able to make my money back on this when I resell it despite the brand. 

12 month dress for $2.  I am sure she'll wear this for Memorial Day or Fourth of July and hopefully, I will get tons of cute holiday pictures out of it.

I couldn't resist this watermelon dress and matching diaper cover for $1.50.

These shorts were all sold individually for either .50 cents or $1.  I was desperate to find some khaki or jean shorts to easily match her summer tops and onesies.

4 pair of 2t rubber pants for $1.  I was saddened to discover these will be way too big for her tiny hiny.  I am really struggling to find potty training supplies in sizes small enough for her.  

Melissa and Doug magnetic letters and numbers $2

$1 for this soft potty seat.  Can you tell I'm trying to gear up for potty training?

$2 for these Robeez.  These are a brand, I am willing to pay a bit more for in general since I do prefer having her in soft soled shoes, and they have great ratings.

18 month rubber pants for $1.  I know they seem like boy colors, but I am not that worried about it since finding any sizes below 2t is rare, and I suspect few people will be looking at what is on her bottom.

$2 for these sandals due to my ladybug obsession.


$1.50 for this Dr. Seuss book which is more than I'd like to pay but not a title I've seen at sales thus far.


$2 for this set of Beginner Books.

$1 for the Berenstein Bears book which is a classic I remember from my childhood.

I paid $1 for the monkey backpack toddler leash.  I have stated several times I am a huge advocate of babywearing, so this purchase may be surprising and perhaps even more so if I told you this was the first item I went looking for.  Well, as much as babywearing is convenient, there are some times where I want to let her get down ie folk music festivals, kid friendly events, amusement parks, and parks where I worry about potentially losing her in a crowd since she's a runner.  We tested it at a recent visit to the hospital just to get her used to it.  She really liked wearing it perhaps because she was in love with the monkey or because she's seen us with bags on.  For us, this is only for certain occasions and hopefully a short term solution as we work on her not trying to run off.  

Tuesday, May 17, 2016

Root Vegetable Hash with Amy's Kitchen Veggie Sausages

Meatless Monday


I almost never post a recipe with a specific product in the ingredients.  However, up until these links, I hadn't come across a particular faux sausage link that I particularly cared for.  While I like Amy's Kitchen products in general, I had never tried their Veggie Sausages just because of my aversion to faux sausage links I cared as well as breakfast being the meal I least worried about getting additional protein since I often have yogurt or eggs.  Target was recently resetting their grocery department and eliminating tons of products to make room for new products.  I was quite sad over this reset since they no longer carry some of my favorite products including the Amy's Kitchen Veggie Meatballs.  While I was stocking up on the Veggie Meatballs, I decided to try their Veggie Sausages since they were also being discontinued at Target.  After trying the Veggie Sausages, I was pleasantly surprised that they tasted almost exactly like the Veggie Meatballs I already liked with a nice smoky flavor and lots of fennel seeds.

I immediately know, I needed to come up with a hearty recipe to compliment the robust flavor of these tasty links instead of relegating to just being an accompaniment to eggs and toast.  With this year's late frosts, we have yet to get into much local spring or summer produce.  However, root vegetables are still in abundance.  Since I like the combination of sweet and smoky, I thought a slightly nontraditional hash might be the perfect vehicle for these links.  I decided to use a red pepper and yellow pepper continuing the red pepper already in the links but also to pump up the color.

I chose to boil the potatoes and turnips first to ensure that they were fully cooked and would have a crisp exterior for the hash.  This is a great trick whenever making hash or homefries to not only make your saute time quicker but also ensure a nice crisp exterior to your potatoes.

So, here's the recipe:

3 white potatoes
3 turnips
1 sweet potato
2 carrots
2 parsnips
1 package Amy's Veggie Sausage
1 yellow pepper
1 red pepper
1 tbs minced garlic
1 tsp garlic seasoning
olive oil
salt and pepper to taste

1. Dice the white potatoes and turnips into 1 to 2 inch cubes.

2. Boil the potato and turnips until soft.

3. Dice the remaining veggies into 1/2 to 1 inch cubes.

4. Cook the veggie sausage in a pan according to the package instructions.

5. Saute the peppers, garlic, and spices with olive oil until the peppers are soft.

6.  Saute the root vegetables with olive oil until the potatoes are nice and crisp on the outside.

7. Cut up the sausages into 1 inch segments.

8. Combine all the ingredients in a pan and cook until combined usually less than 3-5 minutes.

Serve the hash by itself or as I prefer it topped with an over easy egg.  I love the contrast of the creamy yolk over the hash.  I prefer to accompany this hash with sauteed greens.

This post was in no way sponsored by Amy's Kitchen.  

Tuesday, May 10, 2016

Lactose Free Asparagus and Mushroom Crustless Quiche

Meatless Monday 


I didn't quite get this published in time for it to go out Monday since the little one was being quite rambunctious today.  I am fairly sure she managed to take out every block of which she has 3 kinds, car, animal, doll, musical instrument, etc and cover the floor with them no less than 4 separate times today.  And, we did manage to have a break from the rain for a few key hours this afternoon allowing me to take some time to work on my container garden which was a must with another week of rain impending after last week having rain every day.  So we'll be celebrating Meatless Monday a day late which is fine with me since I make every day meatless. 

I must admit that we had gotten into a bit of a breakfast rut.  Our usual breakfast has become scrambled eggs, fruit often a banana and a clementine, and bread either toast or a bagel with peanut butter.  I think it is now not just because it is routine but also such a quick meal to make in the mornings when I am often functioning at less than 100%.  While I am successful in working in lots of veggies into most meals, they've been distinctly lacking from our breakfast routine.   

After hitting a sale week that included eggs, asparagus, and mushrooms, I decided this crustless quiche would be a great way change our routine just a bit and work some veggies into breakfast.  

By the way, the top isn't burnt at all as a friend asked.  All the veggies rose to the top.  This yeilded 6-8 portions which we split over a few days.  

6 eggs
4 oz lactose free cheese crumbled or grated depending on the cheese
1 cup soy milk or plant based milk of your choice
4 oz portabello mushrooms
1/2 lb of asparagus
1 tsp baking powder
1 tablespoon flour
salt and pepper to taste
1 tsp ground sage
olive oil

1. Julienne your mushrooms and saute them.

2. Cut your asparagus into pieces between 1-2 inches long.

3. Beat your eggs together.

4. Add in the remaining ingredients.

5. Grease your baking dish with olive oil.

6. Preheat your oven to 375 degrees.

7. Bake at 375 degrees for 35 minutes or until your knife comes out of the center clean.

Monday, May 9, 2016

How to save money on baby stuff at Target

1. Register for your baby at Target
  • Once you've registered, you can stop by Customer Service and pick up a swag with samples, some full size products usually a bottle and a pacifier, a few manufacturer's coupons, and a valuable coupon book with Target coupons.  These coupons are often high dollar coupons.  And. since they are Target coupons, they can be stacked with manufacturer's coupons for even bigger savings.
  • About a month before your due date, you receive a coupon book in the mail with completions coupons for a percentage off items remaining on your registry.  My booklet has three 10% off coupons to give to family and friends and one  15% off coupon for us to use.  This can be combined with any other coupons or discounts you have.  When I used mine, we were able to get $165 worth of merchandise for $9.  Since it was good for up to 6 months after her due date, we waited until a month after she born and the gifts had mostly come in to purchase items we still needed.
  • Put everything you may need on your registry.  Often, people only put items they think they may receive on the registry.  But, in order to use your completion coupon, the items will have to be on the registry.  So, put things like batteries, nursing pads, a water bottle, photo frames, etc you may need in order to save money.
  • Since I created my registry, I must have been added to their baby coupon master list; because only since then have I been receiving some valuable coupon books in the mail specifically for baby stuff from Target.  In fact, I just received one of their mailers last week and the coupons were or $10 off $50 worth of diapers and wipes, $4 off $25 or more baby feeding items, $4 off $20 or more baby toy purchase, and $5 off $30 children's book purchase. 
  • Print your registry at the kiosk in the customer service before shopping.  The last page of the registry has two coupons.  These are Target coupons which as always can be stacked with manufacturer's coupons.  
  • Returns are way easier if you have a registry.  

2. Take advantage of Target's price matching policy. Target allows you to price match with numerous retailers either by presenting a paper ad or pulling up the price directly from a website.  I was to price match with Amazon a toy I wanted for my daughter and use my completion discount and Red Card discount.  Price matching can also be nice if you find items cheaper online and want to avoid shipping fees.  


3. Use your Red Card.  Target's Red Card saves you 5% of all purchases and allows you free shipping on all online purchases.  What many people seem to not know is that the Red Card doesn't just have to be a credit card.  You can also get the Red Card as a debit card and have it directly connected to your bank account.  You can sign up online or in store with a voided check.


4. Bring your own bags.  Every bag of your own you use saves you 5 cents.  This may not seem like much, but it adds up over time.  Just this week, I've saved 45 cents on my Target purchases just using my own reusable bags.  Over the course of a year, that easily adds up to over 20 dollars and lots less plastic bags I have to take to be recycled which is a bonus since I'm all about reducing waste.


5. Check Target's website for coupons before going shopping.  The section for coupons is listed on the menu at the bottom of the main page of Target's site.  One of the sections is specifically for baby products. The coupons are a mix of Target and manufacturer coupons.


6. Check and use your Cartwheel.  Cartwheel is a Target only app filled with savings for items throughout their store.  You don't have to have a smartphone to use their app though as long as you have a tablet with WiFi capability since Target has free WiFi.  I am still a Luddite living without a smartphone as we are trying to limit our little one's screen time.  However, I do have my Kindle as I purchased it a few years ago for reading on the go.  I recommend looking up items on your Cartwheel prior to shopping to more easily plan your trip.  They make it simple since there is a section just for baby items.  However, I also check items as I am shopping especially clearance items I find while shopping.  Over half of the items on clearance I have purchased in the last month have also been on Cartwheel giving me additional savings.  


Cartwheel is most beneficial the more you use it.  There are different badges to unlock for things like saving $25 using Cartwheel, flipping a deal a friend used, using a Cartwheel on the last day it is available, using a Cartwheel deal on an item in the weekly ad, etc.  The more badges you unlock, the more Cartwheel deals you can have flipped to use at any given time.  Right now, I'm at 30 available slots in my Cartwheel.  

Read the restrictions, though, when you go to use your Cartwheel.  Most deals have limitations you have to follow.  You can find the restrictions for each offer as they vary from offer to offer by clicking the details button on each deal.  For instance, the restrictions on the Huggies deal currently on Cartwheel is you can only use the Cartwheel deal 4 times per transaction and only 6 transactions per day.  So, if necessary depending on the deal, you may need to divide your purchases into multiple transactions in order to maximize your savings.

7. Search for items on clearance.  Yes, some items will be traditional clearance items which may score you deals; but Target stores also clearance online returns made to the brick and mortar stores.  You will know it is an online return as it will say Online Item on the red clearance sticker.  People post all the time in babywearing groups I am a member of on Facebook about scoring killer deals on carriers this way.

While I yet to be lucky enough to find a great deal on a carrier I wanted, I did score this Skip Hop playmat which was an online only item retailing for $36 that I was able to pick up for just $8.


It actually became our favorite playmat as it came with the two toys; a rattle and a mirror, a pillow that made tummy time much easier, and a handy travel bag.  I took this to our mommy and me support group every week until she was 6 months old as well as using it at home for tummy time and some trips to my grandmother's house like this shot from Easter last year.


Saturday, April 30, 2016

Baby B More Organic Bandana Bib Review #babybmore


I would normally use this bib for drool and a wipeable bib for meals, but this was pretty much the only way I could get her to sit still long enough for a picture.
It seems my little one is constantly teething.  In all honesty, she's had 17 teeth for months now, but these last three teeth are taking forever to come in.  She goes through random periods over the last few weeks of days where she drools a ton.  Her last tooth lead to a drool rash on her chin she was drooling so consistently.  I felt so awful for her when she got the rash even though I was able to clear it up in less than 2 days.  No one wants their little one to have a rash especially if there is any way we can prevent it.

When I came across these multilayer bandana style bibs, I had to give them a try.  I wanted something that would catch drool but was also soft enough to wipe away what was accumulating on her chin.

When I received the bibs, I was pleased with the gender neutral designs. Plus, being a bandana, I find them way cuter for her to wear all day than a traditional bib.  I think she looks quite fashionable with these bibs on as if it is an accessory not a merely functional bib. Sometimes, colors online aren't true to color; but these were.  I could definitely see using these not only with my daughter, but also if we had another little one regardless of whether we had a girl or boy.  I also thought the designs were stylish and modern especially the chevron and anchors.  We are definitely able to work them in with her current spring and summer outfits.  The hearts would have been perfect on Valentine's Day.  In fact, I've yet to find an every day outfit these didn't work with.


In addition to the yellow and white chevron LB is modelling above, the other designs are as pictured grey and white clouds, red and white hearts, and teal and white anchors.

I appreciate that there are two snaps to adjust to baby's size as they grow into a toddler.  Most bibs I've found are either sized for tiny babies or toddlers but rarely grow with them like these.  The snaps are also nickel free in case baby has sensitivities.

I found that due to the multiple layers of cloth, these bibs are much more absorbent than other drool bibs we've used in the past.  The bottom layer is a soft fleece, so you could even put this on a baby without a shirt in the summer which is nice.  The top layer of fabric was a bit stiff but softened right up after the first wash.  I was surprised by how well these bibs absorbed without getting her chest wet at all.


You can purchase these here.


I received this product for free in exchange for a review, but all opinions are honest, genuine, and my own.